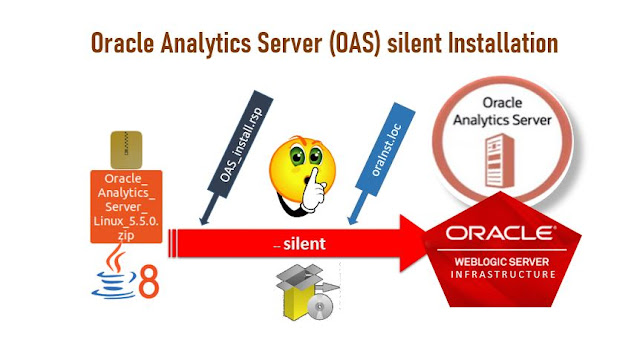
Oracle Analytics Server 5.5 Silent mode installation
Namaste !! dear MyOFMWExperiments followers and new fans warm welcome!!!
Add under ~/.bash_profile OR ~/.bashrc the following lines


c. Now create the Oracle Product inventory file as /u01/oraInst.loc
d. All the above steps completed then ready to install the Middleware Infrastructure in silent mode, run the followning command to install:
e. Update the environment variablees into .bashrc file run the bash then check the weblogic version to confirm the silent installation
b. We can use the same oraInst.loc file which was created for FMW Infrastructure installation
c. Verify the directory structure after installation of OAS
Here I came with a new Oracle product which I've explored very recently and it is too good. Earlier with 12c product list, it was OBIEE that is specially designed for Business Intelligence. Now the latest trending BI tool from Oracle is Oracle Analytics Server.
In this post, we will be learning about step by step process for Installing Oracle Analytics Server 5.5 on an Oracle Linux box. My always favorite composition of Vagrantfile to bring up 'Oracle Linux 7'. The same steps will work on all Linux favors.
Prerequisites
> Install Oracle VM VirtualBox
> Install Vagrant
Regular download and install them if you don't have on your system.
Assumption:
You can have Oracle Linux 7 VM or Docker container or Vagrant Oracle Linux/7 Box is up and running.
What we do in this experiment?
1. Install JDK 8 (latest stable version)
2. Silent Install FMW Infrastructure 12.2.1.4.0
3. OPatch installation for FMW Infrastructure 12.2.1.4.0
4. Silent mode Installation of Oracle Analytics Server
Step 1:. Install JDK 8
Download the latest stable version of Oracle JDK 8, As per the best practices says when you have JDK installer extracted it always gives a directory with sub-version, but when you go for every 3 months new JDK, it will be unsed to make it effectively you can use generic name 'java' folder as Java installed location will be best choice fo reuse it.
file=jdk-8u241-linux-x64.tar.gz
master_dir=/u01/app
mkdir -p $master_dir
tar -xvf  $file -C $master_dir/java
Add under ~/.bash_profile OR ~/.bashrc the following lines
export JAVA_HOME=/u01/app/java
PATH=$PATH:$HOME/.local/bin:$HOME/bin:$JAVA_HOME/bin
Now verify that Java installation is in PATH and that should show the version
java -version
java version "1.8.0_241"
Java(TM) SE Runtime Environment (build 1.8.0_241-b07)
Java HotSpot(TM) 64-Bit Server VM (build 25.241-b07, mixed mode)


Step 2. Silent Install FMW Infrastructure 12.2.1.4.0
a. Decompress the Oracle FMW Media file into /tmpunzip -d /tmp /vagrant/data/fmw_12.2.1.4.0_infrastructure_Disk1_1of1.zip ls -l /tmp/fmw* #confirm fmw jar file extractedb. Create the response File with answers include where to install Middleware and Install type in /u01/fmw_infra.rsp
echo "[ENGINE]
Response File Version=1.0.0.0.0
[GENERIC]
ORACLE_HOME=/u01/app/oracle/Middleware
INSTALL_TYPE=Fusion Middleware Infrastructure
DECLINE_SECURITY_UPDATES=true
SECURITY_UPDATES_VIA_MYORACLESUPPORT=false" >/u01/fmw_infra.rsp
c. Now create the Oracle Product inventory file as /u01/oraInst.loc
echo "inst_group=dba
inventory_loc=/u01/app/oracle/oraInventory"> /u01/oraInst.loc
d. All the above steps completed then ready to install the Middleware Infrastructure in silent mode, run the followning command to install:
java -jar /tmp/fmw_12.2.1.4.0_infrastructure.jar -silent \
-responseFile /u01/fmw_infra.rsp \
-invPtrLoc /u01/oraInst.loc
e. Update the environment variablees into .bashrc file run the bash then check the weblogic version to confirm the silent installation
echo 'export MW_HOME=/u01/app/oracle/Middleware
export WL_HOME=${MW_HOME}/wlserver
export CLASSPATH=${WL_HOME}/server/lib/weblogic.jar' >> /u01/.bashrc
bash
java weblogic.version
Step 3. OPatch installation for FMW Infrastructure 12.2.1.4.0
The following instruction will be useful for all Opatch installations of andy FMW products a. Ensure that set your ORACLE_HOME set to the MW_HOME where the FMW installedexport ORACLE_HOME=$MW_HOMEb. Uncompress the patch file which is downloaded from the support.oracle.com, extract into a dedicated folder named PATCH_TOP
mkdir $MW_HOME/PATCH_TOP -p
unzip -d $MW_HOME/PATCH_TOP p30657796_122140_Generic.zip
cd /u01/app/oracle/Middleware/PATCH_TOP/30657796/
export OPATCH_NO_FUSER=true
c. Install the Oracle patch with 'optach apply' option from the PATCH_TOP/butnumber folder as shown
$WL_HOME/../OPatch/opatch applyd. Once the above step successful, We can double check the patch applied by 'opatch lsinventory' command
export ORACLE_HOME=$WL_HOME/.. # make sure it will point to MW_HOME
cd $WL_HOME/../OPatch; ./opatch lsinventory
4. Silent mode Installation of Oracle Analytics Server
a. Create the Responsefile for OAS 5.5 installation which focus with Installation path mentioned in 'ORACLE_HOME' and 'Install type'echo "[ENGINE] Response File Version=1.0.0.0.0 [GENERIC] ORACLE_HOME=/u01/app/oracle/Middleware INSTALL_TYPE=Oracle Analytics DECLINE_SECURITY_UPDATES=true SECURITY_UPDATES_VIA_MYORACLESUPPORT=false" >/u01/oas_install.rsp
b. We can use the same oraInst.loc file which was created for FMW Infrastructure installation
java -jar /tmp/Oracle_Analytics_Server_5.5.0.jar -silent \
-responseFile /u01/app/oracle/oas_install.rsp \
-invPtrLoc /u01/app/oracle/oraInst.loc -ignoreSysPrereqs
c. Verify the directory structure after installation of OAS
cd $MW_HOME/bi
ls  --format=single-column
Finally we are successfully completed OAS 5.5 installation in silent mode. Keep writing your comments and sharing to your teams and friennds about this technical post.


Comments
Post a Comment