Friday, July 17, 2020

Deploying Web Catalog on BI domain
Namaste!! Welcome to 'My OFMW Experiments' blog!, Here in this post, I would like to explore more deeper about CLI tools available on Bi platform. 

BI Catalog deployments


Earlier in OBIEE there were multiple catalog files together can be deployed with BAR files. Now in OAS we have to use runcat.sh or runct.cmd script. that is present in the BI domain/bitools/bin directory.


Deploying Web Catalog on OBIEE/OAS domain


Help of runcat command

The following is the OBIEE 12.2.1.4 Environment with the -help options.
	# Command : -help

Catalog Manager understands commands in the following areas:

Development To Production
createFolder            Creates folder in the catalog
delete                  Deletes the given path from the catalog
maintenanceMode         Puts the catalog into or out of Maintenance Mode (aka ReadOnly)
rehash                  Rehashes /users in the catalog
rename                  Renames an item in the catalog
report                  Generates a report on the contents of the catalog
replace                 Search and replace on the contents of the catalog
repair                  Repairs damage caused by errant 3rd party ftp programs
localize                Enables localization for catalog contents
archive                 Creates an archive of a subset of the catalog
unarchive               Extracts an archive into the catalog
archiveContent          Returns the List of Objects in the Archive File
setItemProperties       Sets the properties for an object in the web catalog
upgradeCatalog          Upgrades catalog from 11g (11.1.1.7.0) or later version to latest version.
exportCatalog           Export catalog in offline mode
migrate                 Migrates a catalog object from one type to another

Patch Management
tag                     Tags all XML documents in a catalog with a unique id and common version string
diff                    Compares two catalogs
inject                  Injects a single item to a diff file
injectBatch             Injects multiple items to a diff file
createPatch             Creates a patch to upgrade a catalog from one version to another
applyPatch              Applies a patch to a catalog
publisherPermissionsImport      Imports BI Publisher Permissions into the web catalog
detectConflicts         Compares two diff files
combineDiffs            Combines multiple diff files to produce single diff file

Account Management
renameAccounts          Renames users/groups/approles in the catalog
forgetAccounts          Removes users/groups/approles from the catalog
replaceAccountInPermissions     Replaces a specified account with another in all catalog object ACLs
setOwnership            Set the ownership property for an object in the web catalog
setItemPermissions      Add/Modify/Delete a permission entry in the ACL of an object in the web catalog
migrateWebcatGroupsToApproles   Change web catalog groups to approles across the entire catalog, with "_GRP2ROLE_" prefix.

Subject Area Management
clearQueryCache         Clears the query cache

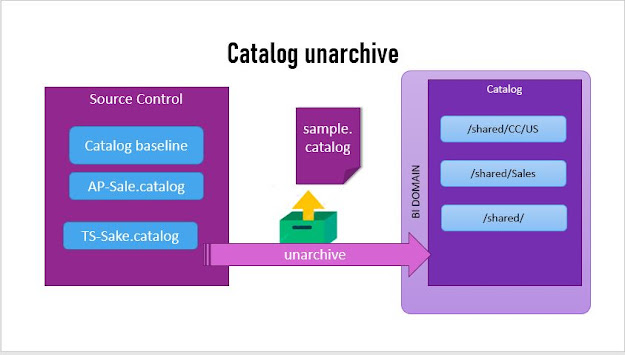
Catalog Unarchive

There are two options for this unarchive command online offline

Unarchive with online option


The Unarchive command with online will be using boot.txt as a credentials. So to pass this boot.txt file let's create a boot.txt file that contains the WebLogic domain console credentials.
login=weblogic
pwd=MyOFMW123

./runcat.sh -cmd unarchive -folder 
"/shared" -online http://localhost.locladomain:9502/analytics-ws/saw.dll 
-credentials boot.txt 
-inputFile "/u01/deliverables/reports/sample.catalog" -overwrite all

Unarchive with offline option


This option we will be using whenever online option fails! but not necessary. Here you don't need to give the running BI service details for runcat command. The common thing in online and offline are: -inputFile for "Catalog" file path and -folder.
./runcat.sh -cmd unarchive -offline /u01/fmw/domains/demo_domain/bidata/service_instances/ssi/metadata/content/catalog \
-inputFile "/u01/deliverables/reports/sample.catalog" -folder /shared

CatalogManager Account management

We can do this activity in online and offline modes. The help command gives syntax and examples of Setting permission as well.
 
./runcat.sh -cmd setItemPermissions -help

Add Account Permissions offline to a Catalog


Oracle BI CatalogManager is connecting offline and the add the account permissions as per the needs. Here in this example I've choosen 'BIServiceAdministrator' assign to approle generally it will be 'weblogic' user. This command will be using only catalog user population on the instance by refering to the default Instance path.
Now let's do simple add experiment
 
[oracle@obiee bin]$ ./runcat.sh -cmd setItemPermissions -setOption changeMentioned -changeOption add -accountName "BIServiceAdministrator" -accountType approle -permission F -item "/shared/Sample DV Projects" -recursive true -offline /u01/obiee/app/Middleware/user_projects/domains/bi/bidata/service_instances/ssi/metadata/content/catalog
Instance Name is missing. Using default Instance Name: obips1
Using Oracle BI Home: /u01/obiee/app/Middleware/bi
env:
INSTANCE_NAME: obips1
ORACLE_HOME: /u01/ora180/app/oracle/product/18.0.0/dbhome_1
ORACLE_INSTANCE: /u01/obiee/app/Middleware/user_projects/domains/bi/config/instances/i1
BI_PRODUCT_HOME: /u01/obiee/app/Middleware/bi
DOMAIN_HOME: /u01/obiee/app/Middleware/user_projects/domains/bi
ORACLE_BI_APPLICATION:
COMPONENT_TYPE:
COMPONENT_NAME:
ORACLE_BIPS_INSTANCE_CONFIGDIR: /u01/obiee/app/Middleware/user_projects/domains/bi/config/fmwconfig/biconfig/OBIPS
ORACLE_BIPS_INSTANCE_DIAGNOSTICSDIR: /u01/obiee/app/Middleware/user_projects/domains/bi/servers/obips1
ORACLE_BIPS_INSTANCE_TEMPDIR: /u01/obiee/app/Middleware/user_projects/domains/bi/servers/obips1/tmp
JAVA_HOME: /u01/common/java/jdk1.8.0_191
LD_LIBRARY_PATH: :/u01/obiee/app/Middleware/bi/modules/oracle.bi.datadirect.odbc/8.0.2/lib:/u01/obiee/app/Middleware/bi/modules/oracle.bi.datadirect.odbc/8.0.1/lib:/u01/obiee/app/Middleware/bi/modules/oracle.bi.datadirect.odbc/7.1.6/lib:/u01/obiee/app/Middleware/bi/modules/oracle.bi.datadirect.odbc/7.1.5/lib:/u01/obiee/app/Middleware/bi/modules/oracle.bi.datadirect.odbc/7.1.4/lib:/u01/obiee/app/Middleware/bi/modules/oracle.bi.datadirect.odbc/5.3/lib:/u01/obiee/app/Middleware/oracle_common/jdk/jre/lib/amd64/server:/u01/obiee/app/Middleware/oracle_common/jdk/jre/lib/amd64//://://:/u01/obiee/app/Middleware/bi/bifoundation/server/bin:/u01/obiee/app/Middleware/bi/bifoundation/web/bin:/u01/obiee/app/Middleware/bi/clients/epm/Essbase/EssbaseRTC/bin:/u01/obiee/app/Middleware/bi/bifoundation/odbc/lib:/u01/obiee/app/Middleware/bi/bifoundation/lib:/u01/obiee/app/Middleware/bi/lib:/u01/obiee/app/Middleware/lib:/u01/obiee/app/Middleware/oracle_common/adr:/u01/obiee/app/Middleware/oracle_common/lib:
BIFNDN_LABEL =BIFNDN_12.2.1.4.0_LINUX.X64_180408.2241
# Command : -cmd setItemPermissions -setOption changeMentioned -changeOption add -accountName BIServiceAdministrator -accountType approle -permission F -item /shared/Sample DV Projects -recursive true -offline /u01/obiee/app/Middleware/user_projects/domains/bi/bidata/service_instances/ssi/metadata/content/catalog
[Util Logger] Type: Information. Severity: Fatal. File: project/webutil/deploymentprofile.cpp. Line: 192. Deployment profile is ON_PREMISE
N1      saw.catalogmanager      Oracle BI CatalogManager 12.2.1.4.0 (Build BIPS-20180409020153 64-bit) is connecting offline.
N1      saw.catalog.manager.loadCatalog Catalog system -
         Running mode is: 12c
         Catalog reside in: File System
         Tenancy mode is: Single Service Instance
N1      saw.catalog.manager.initialize  Using only catalog user population
N1      saw.catalog.local.initialize    Instance Catalog Path: '/u01/obiee/app/Middleware/user_projects/domains/bi/bidata/service_instances/ssi/metadata/content/catalog/root'.
Command 'setItemPermissions' completed successfully.
Return status from Catalogmanager command : 0

Remove permissions offline


You can remove the account permission for a Catalog in Offline mode. Sample catalog : Sample DV Catalog and it is for AccountName BIServiceAdmnistrator.
  ./runcat.sh -cmd setItemPermissions -setOption removeMentioned -accountName "BIServiceAdministrator" -accountType approle -item "/shared/Sample DV Projects" -recursive true -offline /u01/obiee/app/Middleware/user_projects/domains/bi/bidata/service_instances/ssi/metadata/content/catalog

We are building this experiments by learning by doing many success paths by overcoming lots of failures and troubleshootings. You need to double check the input file.

Tuesday, July 14, 2020

Configure Oracle Analytics Server(OAS) Domain

You are not alone if you feel so this post is for you. Many people don't have time or experstis That's why we started in first place. Typical understanding on the WLST/python coding I started exploring on that same idea to configure the OAS domain. But the OAS is much more sofisticated and provides you silent mode option and also once you complete the configuration of OAS domain all our OAS services will be started automatically. 

Note that Vagrant based Oracle Linux installed Oracle VirtualBoxes are hosting Database and OAS. The system prerequisites ignore options that don't solve the LD_LIBRARY_PATH missing libraries. Since it is a simpler model I took couple of trials on the same VM. Learnings with different experiments: 
  1. JDK installed with tar.gz file gives raise to LD_LIBRARY_PATH issues unresolved even though error-out libraries installed in the same OL7 repo.
  2. Another issue encountered while starting the bi_server1 ( Managed server on the OASDomain )

Let's get started the OAS domain configuration prerequisites are :
  1. Oracle Database installed up and running
  2. Oracle Java installed with rpm x64
  3. Oracle Analytics Server installed
  4. Hardware-wise 4Gb RAM is minimum

Now let's explore what all options we have for OAS dashboard component domain configurations:
As per the Oracle documentation found that there are two options
  1. OAS Standard Topology
  2. OAS Enterprise Topology
Usually, the standard topology will be used for the Analytics developers because it will be using the resources low because only a developer who will do test their reports and catalog changes on this. On the other hand, the Enterprise topology will be used to spread on multi-hosted OAS Domain where it is designed to serve production grade setup to server more external load on analytics reports.
and the picture will say a lot about these domains;

Standard topology


Enterprise Topology

Step 1: OAS Installed and Oracle Database up 


Step 2. Silent mode Configuring OAS standard domain

#!/bin/bash
##########################################################################
# FileName      :   config_oas_domain.sh
# Oracle Analytics Server domain configuration script
# Author        :   Pavan Devarakonda
##########################################################################


# Create response file for oas_domain 

echo "[ENGINE]
Response File Version=1.0.0.0.0
[GENERIC]
PERFORM_BI_STARTUP=true
SERVICE_INSTANCE_LIMIT=2
CONFIGURE_BIEE=true
CONFIGURE_BIP=true
INSTALL_EXALYTICS_IN_MEMORY_SOFTWARE=false
SERVICE_INSTANCE_MODE=SINGLE

############ CHANGED BY PAVANDEVARAKONDA ######################3

DOMAIN_NAME=OAS_DOMAIN 
DOMAINS_DIR=/u01/fmw/domains
ADMIN_USER_NAME=weblogic
ADMIN_PASSWORD=weblogic123
ADMIN_CONFIRM_PASSWORD=weblogic123
DOMAIN_WORK=LOCAL

SCHEMA_TYPE=SCHEMA_TYPE_NEW
EXISTING_DATABASE_TYPE=ORACLE
CONNECT_STRING=192.168.33.250:1521:ORCLPDB1
DATABASE_TYPE=ORACLE
NEW_DB_ADMIN_USERNAME=OASUSER
NEW_DB_PASSWORD=welcome1
NEW_DB_SCHEMA_PREFIX=FA
NEW_DB_SCHEMA_PASSWORD=welcome1
NEW_DB_CONFIRM_SCHEMA_PASSWORD=welcome1

PORT_RANGE_START=9500
PORT_RANGE_END=9999

#Select type of initial application.  Supported types are APPLICATION_TYPE_BI_BUNDLE, APPLICATION_TYPE_EMPTY.
APPLICATION_TYPE=APPLICATION_TYPE_EMPTY
BI_DEFAULT_SERVICE_INSTANCE_KEY=ssi" > $RSP_FILE

# Domains directory 
mkdir /u01/fmw/domains -p

ORACLE_HOME=/u01/fmw
RSP_FILE=/sw/responses/oas_config.rsp

$ORACLE_HOME/bi/bin/config.sh -silent -responseFile $RSP_FILE -invPtrLoc /sw/responses/oraInst.loc

Once you run the configuration assistant in standard topology, the AdminServer and Biserver and its component services will be started automatically after the domain creation. To get services running the first time might take time depending on your system speed and RAM size allocations. Initially, I've launched 2GB RAM the AdminServe and components started but failed to start the bi-server (managed server) in the OAS domain. 

An alternative choice for OAS Domain configuration with existing RCU schemas.

oas_domain_config_existing_rcu.rsp

[ENGINE]
Response File Version=1.0.0.0.0
[GENERIC]
PERFORM_BI_STARTUP=true
CONFIGURE_BIEE=true
CONFIGURE_BIP=true
INSTALL_EXALYTICS_IN_MEMORY_SOFTWARE=false
SERVICE_INSTANCE_MODE=SINGLE

############ CHANGED BY PAVAN ####################

DOMAIN_NAME=oas_qa_domain
DOMAINS_DIR=/u01/fmw/domains
ADMIN_USER_NAME=weblogic
ADMIN_PASSWORD=weblogic123
ADMIN_CONFIRM_PASSWORD=weblogic123
DOMAIN_WORK=LOCAL

SCHEMA_TYPE=SCHEMA_TYPE_EXISTING
EXISTING_DATABASE_TYPE=ORACLE
CONNECT_STRING=192.168.33.250:1521:ORCLPDB1
DATABASE_TYPE=ORACLE

EXISTING_DB_PREFIX=QA
EXISTING_DB_PASSWORD=welcome1

PORT_RANGE_START=9500
PORT_RANGE_END=9999
APPLICATION_TYPE=APPLICATION_TYPE_EMPTY
BI_DEFAULT_SERVICE_INSTANCE_KEY=ssi
The command to execute the above domain configuration with existing RCU will be as follows:
  ORACLE_HOME=/u01/fmw
  RSP_FILE=/sw/responses/oas_config_existing_rcu.rsp
  $ORACLE_HOME/bi/bin/config.sh -silent -responseFile $RSP_FILE -invPtrLoc /sw/responses/oraInst.loc

OAS Domain Console 

OAS Domain console access with the port 9500 and the Listen Address combinations as : 


To operate WebLogic domain console; Log in with the OAS domain credentials in my domain it is weblogic/weblogic123


EM Console access

Accessing the Enterprise Manager console (em console) AdminServer Listen address and port will be used with the context as /em 


Post login to the em console :
OAS Domain EM Console

To opera EM console; Log in with the OAS domain credentials in my domain it is weblogic/weblogic123

To resolve the issue increased that RAM size to 4GB then it worked successfully started te bi_server. Able to access analytics url. 


Log in with the same user/password that used to login to WebLogic Admin Console.
OAS Analytics console


Data Visualization console
Login with the same credentials that used for Admin Console.

OAS DV console


We will discuss more details about Enterprise topology configuration in another post. 
Enjoy Lockdown learnings!! about Oracle Anlaytics!

Reference Links:
  1. Ora-base blog on OBIEE 12.2.1.3 Install & configure
  2.  OAS 5.5 docker image creation steps
 
Keep sharing with your technical teams love to hear from you more in the comments!

DataModel Command tool to deploy RPD File

Namaste!! Welcome to My "OFMW Experiments" blog! In this COVID-19 Pandemic, (the Year 2020)critical time keeping myself busy in the new learnings and that too helpful in my workplace as well, here I've chosen topics as  'Oracle Analytics Server' (OAS) administering - RPD deployment. 

The  following diagram developed to understand the process of the Oracle Data Modeler,  how it works on the BI platforms (OAS/OBIEE ) or on the OAC Cloud service as well.

Oracle BI RPD Architecture
How RPD works on Oracle BI Platforms


In this post would like to share the learning experiments which you can do as lab exercise as given examples.
  1. Uploading RPD files to BI platform
  2. Listing Connection pool of an RPD
  3. Update Connection pool of an existing RPD
  4. Download RPD File from existing BI server

let's start working on these 

  1. Upload RPD Files
  2. This task is common for Oracle BI servers and Oracle Analytics services
    ./datamodel.sh uploadrpd \
      -I /tmp/rpds/myOFMWSample.rpd -W oracle123 \
      -U weblogic -SI ssi
      
    Earlier in the OBIEE, you need to provide the hostname where it need to target the Bi server.

  3. List of ConnectionPools 
The datamodel.sh or .cmd  is used for retrieving the list of Connection pools and the output transform to a JSON file.

Command execution line 1:
./datamodel.sh listConnectionpool -SI ssi \
-U weblogic -P MyOFMW123 -S localhost.localdomain \
-V true -O /u01/rpd_cp.json
For more readability, I've broken this command into 3 lines. better you run in a single line.
  • 3. Update the Connection pool from JSON File

  • On the OAS_domain or bi_domain, we can update the database details updated in a JSON file and the 'updateConnectionpool' command will be connected to the service instance and do the update of the connection pool(s). where it takes the following parameters:
    • Connection pool list inside a JSON file
    • Service Instance
    • WebLogic admin console username
    • WebLogic admin password
    • Server host which is running AdminServer

    Command execution line 2:

    ./datamodel.sh updateConnectionpool -C /u02/rpd_cp_up.json \
    -SI ssi -U weblogic -P MyOFMW123 -S localhost.loacldomain
    
    Service Instance is: ssi

    Operation successful.
    Connection pool update completed successfully.
    System exit code: 0


    After updating of the  Connection Pools

    To verify the changes
    ./datamodel.sh listConnectionpool -SI ssi -U weblogic \
    -P MyOFMW123 -S localhost.localdomain -V true -O /u01/rpd_cp01.json
    

    How to download Repository from BI environment?


    There are different options as online and offline download RPD file. The following will be the offline option
    ./datamodel.sh downloadrpd \
      -O /u01/home/downloads/AnalyticsVisualization.rpd \
      -W admin123 -U weblogic -P MyOFMW123 -SI ssi
    

    Saturday, July 4, 2020

    Run RCU for Oracle Analytics Server in Silent Mode

    Namste!!! 🙏Welcome to My FMW Experiments blog!!! This is the "Learning OracleAnalyticsServer Administering series -3". If you are first time visitor please have a look on the series posts:

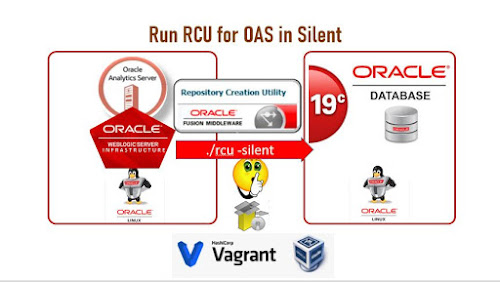
    In this post, I would like to share the run RCU against Oracle Analytics Server. The creation of a Repository using rcu utility made much flexible and easier than ever before. Generally, the rcu works in two options GUI mode and command line silent mode. Automations required the second option that is the silent mode,

    Prerequisites

    • Oracle Database (19c used in this experiemnt)
    • SYSDBA Role user created to run the RCU

    Assumption:
    Oracle database is started and ready to use, that is service which is used for this experiment is PDB that is ON status.

    Run RCU for Oracle Analytics Server in Silent mode


    1. Creating OAS Repositories

    a. Create a DB User for OAS RCU execution

    Creation of DBA user to run RCU a. Connect to the Target DATABASE with DBA role
    sqlplus sys/manager@ORCLPDB1 as sysdba
    then after connected run the following to create another DBA Role user.
    CREATE USER OASDEMOUSR IDENTIFIED BY welcome1;
    grant connect, resource to OASDEMOUSR;
    grant SYSDBA to OASDEMOUSR;
    

    b. Running the RCU to create a repository for OAS

     We can use create the repository with the following parameter.
    • Database Host, Port, and Service Name to form a connection  string
    • A DB user that have SYSDBA role
    • The PREFIX that will be separate from all other schemas
    • The schema names used for OAS are:
      1. STB         
      2. IAU_APPEND  
      3. OPSS        
      4. BIPLATFORM  
      5. IAU         
      6. MDS         
      7. IAU_VIEWER  
      8. WLS         
    #!/bin/bash
    ##########################################################################
    # FileName      :   createRCU.sh
    # Description   :   This script is used to run the rcu in silent mode
    #                   Sample is for OAS product which will work for MDS, ORASDPM, SOAINFRA, BAM
    # Author        :   Pavan Devarakonda
    ##########################################################################
    
    RCU_HOME=$MW_HOME/oracle_common/bin
    RCU_LOG_LOCATION=/tmp/logs
    read -p "Please enter Database Host" DBHOST
    read -p "Please enter Database PORT" DBPORT
    read -p "Please enter DB SCHEMA"  SERVICE
    read -p "Please enter DB USER" DBUSER
    read -p "Please enter RCU PREFIX" PREFIX
    #CONNSTR='192.168.33.250:1521:ORCLPDB1'
    CONNSTR="$DBHOST:$DBPORT:$SERVICE"
    PASS_INPUT="passwdfile.txt"
     
    echo "Running RCU for OAS BI Platform"
    $RCU_HOME/rcu -silent -createRepository -databaseType ORACLE \
    -connectString $CONNSTR \
    -dbUser $DBUSER -dbRole SYSDBA \
    -schemaPrefix $PREFIX \
     -component MDS \
     -component STB \
     -component WLS \
     -component BIPLATFORM \
     -component IAU_VIEWER \
     -component IAU_APPEND \
      -component IAU \
     -component OPSS -f < $PASS_INPUT
    echo "RCU Execution Status: " $?
    
    Screenshot 1:
    RCU for OAS Output

    c. Validation of RCU Schemas on the Database

    Connect to the target database machine via sqlplus or SQLDeverloper tool. Run the following all settings and formatting commands in the sqlplus, for SQLDeveloper you don't need to set or format only execute the SQL Query to get all RCU schema status.

    column COMP_NAME format a35
    column OWNER format a20
    column VERSION format a20
    set pagesize 100
    SELECT comp_name, owner, version FROM schema_version_registry WHERE OWNER LIKE '%DEV%';
    
    Screenshot 2: RCU VALIDATION FOR OAS


    2. List of RCU created Schema

    To fetch the list of schemas from the Database you can run the following to confirm. 
    The example shows the list of OAS specific schema names

    rcu -silent -listSchemas -connectString 192.168.33.250:1521:ORCLPDB1 -dbUser OAS_USER -dbRole sysdba
    
    List of RCU Schema for Oracle Analytics Server


    3. Dropping Repository for OAS


    To drop the repository schemas for OAS from the database you need to provide the following inputs
    a. Database connection string
    b. Database username
    c. The PREFIX that used for creating a OAS repository
    d. prompts for the database user password which as used to create


    #!/bin/bash
    ##########################################################################
    # FileName      :   drop_rcu.sh
    # Description   :   This script is used to run the rcu droprepository in silent mode
    #                   Sample is for OAS product which will work for MDS, ORASDPM, SOAINFRA, BAM
    # Author        :   Pavan Devarakonda
    ##########################################################################
    
    RCU_HOME=$MW_HOME/oracle_common/bin
    RCU_LOG_LOCATION=/tmp/logs
    read -p "Please enter Database Host:" DBHOST
    read -p "Please enter Database PORT:" DBPORT
    read -p "Please enter DB SERVICE:"  SERVICE
    read -p "Please enter DB USER:" DBUSER
    read -p "Please enter RCU PREFIX:" PREFIX
    #CONNSTR='192.168.33.250:1521:ORCLPDB1'
    CONNSTR="$DBHOST:$DBPORT:$SERVICE"
    #PASS_INPUT="passwdfile.txt"
    
    echo "Running RCU for drop OAS Repository"
    $RCU_HOME/rcu -silent -dropRepository -connectString $CONNSTR \
     -dbUser $DBUSER -dbRole SYSDBA \
     -schemaPrefix $PREFIX \
     -component MDS \
     -component STB \
     -component WLS \
     -component BIPLATFORM \
     -component IAU_VIEWER \
     -component IAU_APPEND \
      -component IAU \
     -component OPSS
     echo "RCU Execution Status: " $?
      
    The dropping repository for OAS the last screen shot as follows:
    Dropping repository for OAS


    Troubleshooting points for RCU

    While running the RCU for OAS got the following error:


    ERROR assistants.common.dbutil.jdbc.JDBCEngine: oracle.sysman.assistants.common.dbutil.jdbc.JDBCEngine::onException: SQLException: ORA-00059: maximum number of DB_FILES exceeded
    
    Solution:
    First assess how many are in the system level parameters, if they are in PDB multi-tenant system check at CDB level. Increase it if it is at default value 200, change to 1000 suggested for multiple OAS environments are hosted on the same Database.

    What next target post on OAS?

    • Configure OAS Domain
    • OAS domain start and stop services 

    Thanks for being with me! Share with your teams and friends, Keep writing your comments how do you feel about this?

    Oracle Document References: 

    Friday, July 3, 2020

    Oracle Analytics Server 5.5 Silent mode installation

    Namaste !! dear MyOFMWExperiments followers and new fans warm welcome!!!

    Here I came with a new Oracle product which I've explored very recently and it is too good. Earlier with 12c product list, it was OBIEE that is specially designed for Business Intelligence. Now the latest trending BI tool from Oracle is Oracle Analytics Server.

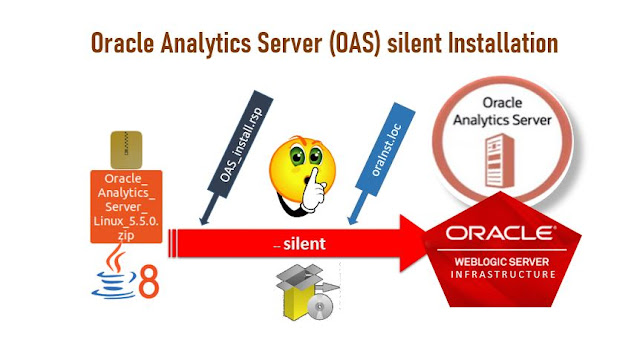
    In this post, we will be learning about step by step process for Installing Oracle Analytics Server 5.5 on an Oracle Linux box. My always favorite composition of Vagrantfile to bring up 'Oracle Linux 7'. The same steps will work on all Linux favors.

    Oracle Analytics Server Installation


    Prerequisites

    > Install Oracle VM VirtualBox
    > Install Vagrant
    Regular download and install them if you don't have on your system.

    Assumption: 

    You can have Oracle Linux 7 VM or Docker container or Vagrant Oracle Linux/7 Box is up and running.


    What we do in this experiment?

    1. Install JDK 8 (latest stable version)
    2. Silent Install FMW Infrastructure 12.2.1.4.0
    3. OPatch installation for FMW Infrastructure 12.2.1.4.0
    4. Silent mode Installation of Oracle Analytics Server 

    Step 1:. Install JDK 8

    Download the latest stable version of Oracle JDK 8, As per the best practices says when you have JDK installer extracted it always gives a directory with sub-version, but when you go for every 3 months new JDK, it will be unsed to make it effectively you can use generic name 'java' folder as Java installed location will be best choice fo reuse it.

    file=jdk-8u241-linux-x64.tar.gz
    master_dir=/u01/app 
    mkdir -p $master_dir
    tar -xvf  $file -C $master_dir/java
    

    Add under ~/.bash_profile OR ~/.bashrc the following lines
    export JAVA_HOME=/u01/app/java
    PATH=$PATH:$HOME/.local/bin:$HOME/bin:$JAVA_HOME/bin
    
    Now verify that Java installation is in PATH and that should show the version
    java -version
    java version "1.8.0_241"
    Java(TM) SE Runtime Environment (build 1.8.0_241-b07)
    Java HotSpot(TM) 64-Bit Server VM (build 25.241-b07, mixed mode)
    

    Step 2. Silent Install FMW Infrastructure 12.2.1.4.0

    a. Decompress the Oracle FMW Media file into /tmp
    unzip -d /tmp /vagrant/data/fmw_12.2.1.4.0_infrastructure_Disk1_1of1.zip
    ls -l /tmp/fmw* #confirm fmw jar file extracted
    
    b. Create the response File with answers include where to install Middleware and Install type in /u01/fmw_infra.rsp
    echo "[ENGINE]
    Response File Version=1.0.0.0.0
    [GENERIC]
    ORACLE_HOME=/u01/app/oracle/Middleware
    INSTALL_TYPE=Fusion Middleware Infrastructure
    DECLINE_SECURITY_UPDATES=true
    SECURITY_UPDATES_VIA_MYORACLESUPPORT=false" >/u01/fmw_infra.rsp
    

    c. Now create the Oracle Product inventory file as /u01/oraInst.loc
    echo "inst_group=dba
    inventory_loc=/u01/app/oracle/oraInventory"> /u01/oraInst.loc
    

    d. All the above steps completed then ready to install the Middleware Infrastructure in silent mode, run the followning command to install:
    java -jar /tmp/fmw_12.2.1.4.0_infrastructure.jar -silent \
    -responseFile /u01/fmw_infra.rsp \
    -invPtrLoc /u01/oraInst.loc 
    

    e. Update the environment variablees into .bashrc file run the bash then check the weblogic version to confirm the silent installation
    echo 'export MW_HOME=/u01/app/oracle/Middleware
    export WL_HOME=${MW_HOME}/wlserver
    export CLASSPATH=${WL_HOME}/server/lib/weblogic.jar' >> /u01/.bashrc 
    bash
    java weblogic.version 


    Step 3. OPatch installation for FMW Infrastructure 12.2.1.4.0

    The following instruction will be useful for all Opatch installations of andy FMW products a. Ensure that set your ORACLE_HOME set to the MW_HOME where the FMW installed
    export ORACLE_HOME=$MW_HOME
    
    b. Uncompress the patch file which is downloaded from the support.oracle.com, extract into a dedicated folder named PATCH_TOP
    mkdir $MW_HOME/PATCH_TOP -p
    unzip -d $MW_HOME/PATCH_TOP p30657796_122140_Generic.zip
    cd /u01/app/oracle/Middleware/PATCH_TOP/30657796/
    export OPATCH_NO_FUSER=true
    
    c. Install the Oracle patch with 'optach apply' option from the PATCH_TOP/butnumber folder as shown
    $WL_HOME/../OPatch/opatch apply
    
    d. Once the above step successful, We can double check the patch applied by 'opatch lsinventory' command
    export ORACLE_HOME=$WL_HOME/.. # make sure it will point to MW_HOME
    cd $WL_HOME/../OPatch; ./opatch lsinventory 
    

    4. Silent mode Installation of Oracle Analytics Server

    a. Create the Responsefile for OAS 5.5 installation which focus with Installation path mentioned in 'ORACLE_HOME' and 'Install type'
    echo "[ENGINE]
    Response File Version=1.0.0.0.0
    [GENERIC]
    ORACLE_HOME=/u01/app/oracle/Middleware
    INSTALL_TYPE=Oracle Analytics
    DECLINE_SECURITY_UPDATES=true
    SECURITY_UPDATES_VIA_MYORACLESUPPORT=false" >/u01/oas_install.rsp 
    

    b. We can use the same oraInst.loc file which was created for FMW Infrastructure installation
    java -jar /tmp/Oracle_Analytics_Server_5.5.0.jar -silent \
    -responseFile /u01/app/oracle/oas_install.rsp \
    -invPtrLoc /u01/app/oracle/oraInst.loc -ignoreSysPrereqs
    

    c. Verify the directory structure after installation of OAS
    cd $MW_HOME/bi
    ls  --format=single-column
    
    Finally we are successfully completed OAS 5.5 installation in silent mode. Keep writing your comments and sharing to your teams and friennds about this technical post.