Tuesday, January 5, 2021

Installation of Oracle Fusion Middleware 12c GoldenGate Monitor & Veridata
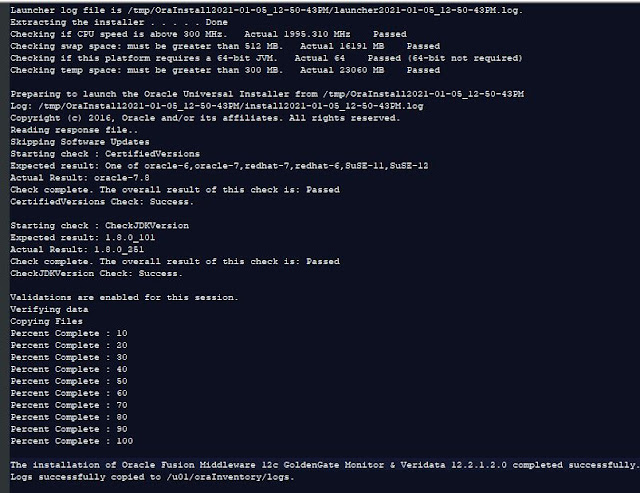
The objective of this blog post is the Installation of Oracle Goldengate Monitoring Agent in a silent mode. Here in this experiment, we will see the silent mode installation of Oracle Fusion Middleware 12c GoldenGate Monitor & Veridata 12.2.1.2.0

Pre-requisite

  • Operating System: oracle-6,oracle-7,redhat-7,redhat-6,SuSE-11,SuSE-12 for this experiment used Oracle Linux 7.8
  • CPU speed is above 300 MHz
  • Memory ; 8GB (min)
  • Diskspace: as per your Data needs to pumped
  • Temp space: must be greater than 300 MB.
  • Swap space: must be greater than 512 MB
  • The platform requires a 64-bit JVM
  • Java version: 1.8.0_101
  • Database: Any database fine- for this choose Oracle Database 12c

Environment Setup


Create Response File


#DO NOT CHANGE THIS.
Response File Version=1.0.0.0.0
[GENERIC]
#The oracle home location. This can be an existing Oracle Home or a new Oracle Home
ORACLE_HOME=/u01/GG_MONITOR12212
INSTALL_TYPE=GoldenGate Monitor Agent Installation
There could be a few important fields that need to add the values are:

Silent mode installation of GG  Monitor

  $JAVA_HOME/bin/java  -jar fmw_12.2.1.2.0_ogg.jar \
 -silent -responseFile /tmp/oggagent_install.rsp \
 -invPtrLoc /u01/inventory/oraInst.loc 


Oracle Goldengate Monitor Agent


References:

Pleasel write your valuable feedback

Installation of Golden Gate 19.x on Oracle Linux

 The objective of this is post is for the installation of Oracle Golden gate 19.x on Oracle Linux.


Pre-requisites

  • Operating System: Oracle Linux 7.x
  • Memory ; 8GB (min)
  • Diskspace: as per your Data needs to pumped
  • Temp space: must be greater than 120 MB.
  • Swap space: must be greater than 150 MB.
  • Database: Any database fine- for this choose Oracle Database 12c

Environment setup

Before running the installer we need to setup the Database Home you can run the 'oraenv' or else export the ORACLE_HOME, ORACLE_SID, and LD_LIBRARY_PATH


Create Response File

There could be a few important fields that need to add the values are:   

  1. INSTALL_OPTION=ORA12c or ORA19c  Specify ORA19c for installing Oracle GoldenGate for Oracle Database 19.x  ORA12c for installing Oracle GoldenGate for Oracle Database 12c and ORA11g for installing Oracle GoldenGate for Oracle Database 11g
  2. SOFTWARE_LOCATION=/u01/OGG_19C you can give as per your needs
  3. START_MANAGER=TRUE if you want to start the GG mgr process
  4. MANAGER_PORT=7878 enter port value which is available on your system
  5. DATABASE_LOCATION=/u01/product/12.2/db_home enter as per your DB installed path
  6. UNIX_GROUP_NAME=dba
The remaining fields you leave empty but should present in the response file.

Sample responsefile for installing Oracle GoldenGate for Oracle Database 12c : goldengate19.rsp
oracle.install.responseFileVersion=/oracle/install/rspfmt_ogginstall_response_schema_v12_1_2
INSTALL_OPTION=ORA12c
SOFTWARE_LOCATION=/u01/OGG19C
START_MANAGER=TRUE
MANAGER_PORT=7878
DATABASE_LOCATION=/u01/product/12.2/db_home
INVENTORY_LOCATION=
UNIX_GROUP_NAME=dba

Execution of Goldengate 19.x installer

To install the Goldengate 19.x in a silent mode we have oraInst.loc and response file and then the installer file.
/tmp/fbo_ggs_Linux_x64_shiphome/Disk1/runInstaller -silent  \
-invPtrLoc /u01/inventory/oraInst.loc \
-responseFile /tmp/goldengate.rsp -waitforcompletion -showProgress

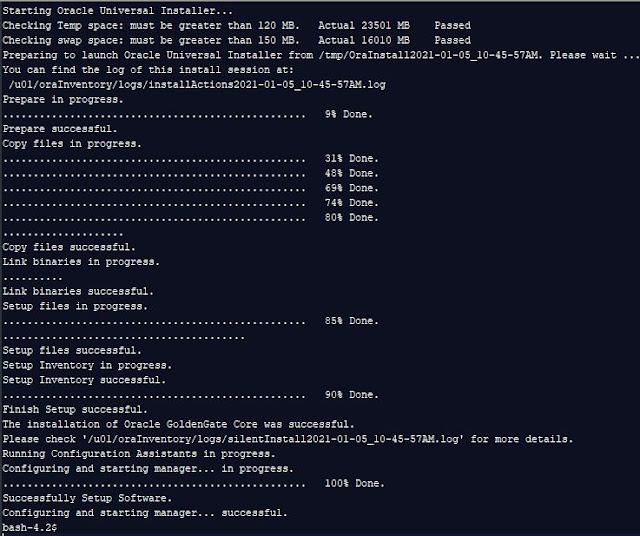
Now let's run the above in action ...

Oracle Goldengate 19 install in silent mode
Oracle Goldengate 19.1 installation in silent mode

Once the installation completes MANAGER process will be started automatically and you can see that with GG prompt 'info all' ...

Goldengate Info All

after this next task would be Oracle GoldenGate Monitor Agent installation.